Showing posts with label dessert. Show all posts

Friday, March 26, 2021

How To Make Carrot Halwa


This traditional Gajar Ka Halwa is made with Carrots, Cream, Khoya, Sugar, Ghee and lots of Nuts. It's a delicious North Indian sweet but is relished on every occasion. Serve this classic, rich and creamy halwa and enjoy it with your loved ones!


Gajar Ka Halwa | Carrot Halwa Recipe | How To Make Carrot Halwa


Happy holi everyone!! Holi is a festival of colors and celebrated with great warmth and high spirit. It’s a major festival in India. It begins with the lightening of bonfire and welcome the new beginnings with open arms. This festival is incomplete without the exchange of gifts, fruits, dry fruits and sweets.


There are host of traditional delicacies that are relished on holi festival and make this occasion even more enjoyable like Pede, Kheer, Gujiya, Puranpoli, Malpua, Ladoo, Thandai, Rasmalai, Jalebi, Sevaiya or Gajar ka Halwa and many more.


Gajar Ka Halwa | Carrot Halwa Recipe | How To Make Carrot Halwa


This Holi, my Mother and I have made Gajar Ka Halwa. It's a traditional North Indian Sweet that both kids and adults can enjoy. It's a must try dessert for winter season. So do try this recipe with your friends and family and enjoy the day!


This dessert hardly needs any occasion to be prepared and relished. It keeps you warm and healthy and can be served at all festivals like Diwali, Eid, Holi, Raksha Bandhan.


Gajar Ka Halwa | Carrot Halwa Recipe | How To Make Carrot Halwa


This Carrot based sweet dessert pudding is so rich and satisfying that I can have it all day and night. The method is sure time consuming, but the halwa is so soft and delicious, and the aroma of the cardamom powder is absolutely irresistible. It’s a slow cooked dessert but if you know the proper method it doesn’t take much time.


All you need is fresh, sweet, and abundance of red carrots which is properly washed, peeled than grated. It goes into non stick pan. Add a lot of khoya, full fat cream, sugar, ghee and lots of nuts in it and your Gajar Ka Halwa is ready. 


So this was the simple recipe of your low fat, low calorie Gajar Ka Halwa. Make this Holi delicacy and also let us know how you like it in the comments below.


Gajar Ka Halwa | Carrot Halwa Recipe | How To Make Gajar Halwa


Gajar Ka Halwa | Carrot Halwa Recipe | 

 How To Make Gajar Halwa 


Preparation time: 15 minutes
Cooking time: 30 minutes
Serves: 6-8 People
Author : The Food Root


Ingredients:


8-10 large carrots
1/2 cup full fat cream (milk cream)
5 tbsp sugar
1 cup crumbled khoya
4 tbsp ghee 


Chopped dry fruits of your choice - (optional)


1/4 tsp cardamom powder
1 tbsp cashews
2 tbsp almonds
1 tbsp raisins
1 tbsp pistachios


Method:


1. Wash the carrots and peel it with grater to discard the skin.


2. Heat the non stick pan, add the grated carrots, mix, and cook them till the quantity is reduced to half, on a medium flame. Stir continuously, until it  changes it's color. It will take around 12-15 minutes. 


3. Pour full fat cream in the pan and stir it continuously till it evaporates. It will take around 2 minutes.


4. Add sugar, as per your sweetness and mix it well. Cook for another 4 minutes on medium flame, while stirring continuously.


5. Next, add crumbled Khoya mix it well. Cover and cook them on a medium flame for around 10 minutes than stir it for a while.


6. Add ghee and mix it for next 2 minutes.


7. Add cardamom powder and chopped dry fruits and mix well for next 2 minutes.


8. And, your gajar ka halwa is ready. Turn off the heat, and let it rest for few minutes before serving.


Notes:


1. You can also add milk in Gajar Ka Halwa and boil it on low heat and keep stirring until the milk evaporates but it's totally optional.


2. I’ve added full fat cream instead of milk so that it doesn't take much time to get ready.


3. It tastes good without cardamom powder as well but the aroma of the cardamom powder in indian desserts is unbeatable.


4. Add chopped dry fruits of your choice.


5. You can also add vanilla ice cream on top of it and serve.


6. It can be prepared a day before or two before a large gathering. Just reheat gajar ka halwa at the time of serving.


7. You can also add some jaggery instead of sugar in the halwa.


8. You can increase or decrease sugar as per your taste.


9. Gajar ka halwa can be stored in the refrigerator for 5-7 days.


10. Even adding ghee in the gajar halwa is totally optional.

Wednesday, January 13, 2021

Til Ladoo or Til Gun Ladoo or Sesame Ladoo


Til Ladoo or Til Gun Ladoo or Sesame Ladoo is a traditional sweet made during Makar Sankranti. This sweet is made with two main ingredients like sesame seeds and jaggery.


Til Ladoo or Sesame Ladoo


Makar Sankranti is a harvest festival known by different names such as Pongal, Lohri, Bihu, Maghi and many other names. It is celebrated at the end of winters.


Some of the common food items eaten on Makar Sankranti are Til Gun ladoos, Puran Poli, Khichdi, Moongphali, Gajak, Gajar ka Halwa, and many others.


Here I’m making Til Gun Ladoo, which is a fuss free sweet, its a super delicious recipe so do give it a try! The best part of this recipe is that it is totally vegan, gluten-free and super healthy. It can be made in less than 20 minutes.


This traditional sweet delicacy is made with two main ingredients like sesame seeds and jaggery. You can also use nuts like walnuts, almonds and peanuts. I’m using peanuts in these ladoos. I’m also using desiccated coconut as it helps in binding the ladoo and helps to store the ladoo for a longer time.


Do try this recipe, I'd love to hear how it turns out for you?


Til Ladoo or Sesame Ladoo


How to make Til Gun Ladoo or Sesame Ladoo


Serves : 3-4 People
Preparation Time : 5 minutes
Cooking Time : 20 minutes
Author : The Food Root


Ingredients 


3 cups sesame seeds
1 cup organic jaggery, crushed
1/2 cup desiccated coconut (optional)
3/4 cup of nuts (optional)
like walnuts, almonds or peanuts. I’m using peanuts here.


Method


1. Roast white sesame seeds in a pan on medium heat for 4-5 minutes. Keep stirring so that it doesn’t burn. Transfer it to a plate. I have kept aside half cup of roasted sesame seeds in a bowl so that we can roll the ladoo in the last.


2. In the same pan, roast peanuts for at least 3 minutes on medium flame than peel off the skin. Than, roughly chop it and transfer it to the same plate.


3. Next, add desiccated coconut in a pan and roast it for 2-3 minutes and transfer it to the same.


4. When all the three ingredients cool down, (sesame seeds, peanuts, and desiccated coconut) coarsely grind them in a food processor for a minute. Add crushed jaggery and grind it again for 30 seconds and transfer it to all of this in one plate.


5. Next, make ladoos with your hands to form a ball. Now roll the ladoo in the 1/2 cup of sesame seeds which you have kept aside to add the texture and you are good to go. Your Til Gun ladoo is ready to serve.


Notes


1. You can use any type of nuts like walnuts, almonds or peanuts. Though I used peanuts just make sure when you are using peanuts remember to peel off the skin.


2. If you are allergic to desiccated coconut or any nuts you can skip it. 


3. You can increase or decrease the jaggery as per your taste.


Saturday, October 31, 2020

Kheer or Rice Pudding


Kheer or Rice Pudding prepared with the goodness of rice, milk, sugar, and garnish with crushed cardamom, dry fruits and nuts like pistachios, cashews and raisins.


Kheer or Rice Pudding prepared with the goodness of rice, milk, sugar, and garnish with crushed cardamom, dry fruits and nuts like pistachios, cashews and raisins.


Rice Kheer is easy to make, and is a one pan method. My family loves this recipe specially my brother. You can serve it both warm and and chilled and keep the leftover rice kheer in the refrigerator.


Kheer is generally made on the Sharad Purnima which is a harvest festival celebrated on the full moon day, marking the end of the monsoon season. It is considered to be the birthday of Goddess Laxmi. This year Sharad Purnima is falling on 30 October 2020.


As per ritual, kheer is left overnight in the moonlight and believe that the rays of the moon on Sharad Purnima has special healing properties. The next day it is consumed and distributed as prasad.


Kheer or Rice Pudding prepared with the goodness of rice, milk, sugar, and garnish with crushed cardamom, dry fruits and nuts like pistachios, cashews and raisins.


Kheer or Rice pudding is a popular dessert across the country as it is quick and easy to make. It can also be prepared on the holidays or special occasions like Diwali which is coming after a week or two.


Here is an easy recipe which you can give it a try. Write down in the comments below what you think about this recipe.


Kheer or Rice Pudding prepared with the goodness of rice, milk, sugar, and garnish with crushed cardamom, dry fruits and nuts like pistachios, cashews and raisins.


Kheer or Rice Pudding


Serves : 6 People
Preparation Time : 15 minutes
Cooking Time : 1 hour
Author : The Food Root


Ingredients


1 litre full fat milk
1/4 cup basmati rice
1/2 cup of sugar
Garnish it with crushed cardamom or your favorite choice of dry fruits or nuts like pistachios, cashews and raisins


Method


1. Rinse basmati rice with water to remove excessive starch.

2. Then soak the basmati rice for at least 15-20 minutes.

3. Take a deep pan and boil the milk on low flame.

4. Add rice and boil the milk and rice on low flame. 

5. You can add 1 cup of water, this step is totally optional.

6. Now keep stirring the rice, milk and water (in case if you added) so that the milk does not stick to the bottom of the pan.

7. Continue to cook on the stove, and keep stirring it on low flame. 

8. Now when you realise that the kheer is almost 80% cooked, add sugar.

9. Keep stirring sugar for next 10 minutes or till it turns light brown.

10. Turn off the flame, and add cardamoms and your favourite nuts by slicing them.

11. You can also garnish the rice kheer by these dry fruits.

12. Serve it both warm or chilled and keep the leftover rice kheer in the refrigerator.


Notes :


1. Use basmati rice (or kheer wale chawal) as they are the best to make Kheer or Rice Pudding.

2. Use condensed milk in the kheer as it helps in making your kheer more sweet.

3. You can also add brown sugar instead of white if you want.

4. Adding 1 cup of water while boiling rice and milk together, is totally optional. (This trick of adding water helps as the mixture of rice pudding begins to thickens a lot.)

5. You can also garnish it with saffron strands.

6. In case you like cardamoms or dry fruits, you can slice them and add them in the kheer.

7. You can serve the kheer both warm or chilled and keep the leftover rice kheer in the refrigerator.


Saturday, October 5, 2019

Warm Fudge Brownie With Vanilla Ice-Cream


Hot sizzling brownie with vanilla ice-cream topped with some chocolate sauce.


Starting a warm and cozy weekend with a plate of warm fudge brownie with vanilla ice-cream topped with some chocolate sauce. It’s super refreshing, has a crisp aroma and is among the world’s most tempting treats. It has a natural sweetness and is a light substitute for rich dessert.

Indulge in this warm fudge brownie without any guilt made from ingredients like dark chocolate, butter, milk, flour, powdered sugar, baking powder, salt, vanilla essence and walnuts. It’s an easy dessert recipe which can be made in less than 45 minutes.


Hot sizzling brownie with vanilla ice-cream topped with some chocolate sauce. The sweet nutty flavour and the rustic texture is sure to satisfy all your sweet cravings.


Brownies are always a fun dessert. They are perfect for anytime of the year. I couldn’t believe I never made brownies before. This is the first time i’m making it and i’m so happy. It's a classic dessert that never goes out of style.

It has some surprising deliciously flavours. The sweet nutty flavour and rustic texture is sure to satisfy all your sweet cravings. This dessert is rich, moist, creamy, fudgy and melt in mouth completely. The nuts and the chocolate sauce gives the great flavour to the palate.


Brownies are a classic and a fun dessert and are perfect for anytime of the year. This dessert is rich, moist, creamy, fudgy and melt in mouth completely.


Combine all the ingredients together and whisk everything together, until it is totally blended and pan lined with parchment paper and bake it on 350 degrees Fahrenheit. Let it cool for 10 minutes. Then, put the scoop of vanilla ice cream on a warm fudge brownie and drizzle chocolate sauce over it and enjoy with a cup of coffee or cold drink. Hope you all enjoy!

Check out my other posts on easy and yummy dessert recipes like - Dry Fruit Custard, Pistachio Ice-Cream and Shahi Tukda.


Hot Sizzling Brownie With Vanilla Ice-Cream


Preparation time: 15 minutes
Cooking time: 45 minutes
Serves: 4-5 people
Author: The Food Root


Ingredients


100 grams Dark chocolate
7-8 tbsp Butter
1 cup Milk
1 cup Powdered sugar
1/4 cup All purpose flour
1/2 tsp Baking powder
1/2 tsp Salt
1 tsp Vanilla essence
6-8 Walnuts, crushed
1 scoop Vanilla ice cream
Chocolate sauce


Direction


1. Preheat oven to 350 degrees Fahrenheit.

2. Meanwhile, grease a 9-inch round cake pan with butter and line it with parchment paper. Brush another layer of butter over the parchment paper and grease it again and set it aside.

3. Take a small bowl and melt dark chocolate and butter and pour it into a large mixing bowl. Add milk, salt, vanilla essence, and sift powdered sugar, baking powder, all purpose flour and whisk everything together, until it is totally blended.

4. Pour the batter into the prepared pan and add crushed walnuts over the mixture and bake it for 25-30 minutes.

5. Gently peel off the parchment paper. Let the brownies cool completely, for about 10 minutes in the pan before slicing them into squares.

6. Take out the serving plate and put the scoop of vanilla ice cream on a warm fudge brownie and drizzle some chocolate sauce, if desired.


How To Make Chocolate Sauce


Ingredients


1 tbsp butter
1 cup milk
1/2 cup chocolate chips
2 tbsp heavy cream


Direction


Add butter, milk and chocolate chips in a bowl and microwave for 30 seconds. Then, add heavy cream and microwave for another 10 seconds, and stir to get a smooth chocolate sauce.


Thursday, August 8, 2019

Mango Blueberry Smoothie


Mango Blueberry Smoothie is a simple, healthy rich dessert which will wake up your taste-buds and gives you instant energy. This is my go-to smoothie recipe, and is vegan and gluten free.


Mango Blueberry Smoothie is a simple, healthy rich dessert which will wake up your taste-buds and give you instant energy.


Since summer in India doesn’t seem to end anytime soon, indulge in this delicious mango blueberry smoothie. It’s full of natural fruit flavours and sweetness. It's a delicious and healthy way to start off a day, and the flavours that comes out from the drink is absolutely delightful.

This 7-ingredient recipe is totally refreshing for a hot summer day and is topped with finely chopped nuts. It’s creamy but light, and loaded with rich flavors and fresh fruits.

This blueberry mango smoothie is one of my favorites ever and is perfect for summer. It's a perfect breakfast smoothie for busy mornings and helps in maintaining good health.

This smoothie is high in fibre, potassium and a powerhouse of antioxidants. It’s full of vitamins and minerals, and has a quality source of protein which helps you feel full for hours.


This is a perfect breakfast smoothie for busy mornings and helps in maintaining good health.


Mango season would be totally deprived of it glory if you don't try this delicious mango berry smoothie. It is packed with nutrients and fresh seasonal fruits. You should definitely try this before the mangoes vanish from the market.

Mangoes are a versatile and an interesting fruit. You can add them in slushies, cakes, ice-creams, salads, smoothiesdipspickles, or sweet-dishes. Though, I don't love mango so much but I love adding them in smoothies.

I've also added 1/2 cup of fresh blueberries. They are a popular summer treat which gives a fresh and crisp flavor to the smoothie. Blueberries are packed with various health benefits, and can make the smoothie more wholesome and nutritious, and, it's texture is extremely surprising.

After a bit of trial and error, I used some of the most healthful smoothie ingredients like -

Fruits - Mango, Blueberries
Thickener - Greek yogurt, Ice cubes (optional)
Liquid base - Almond milk, Water (optional)
Flavoring - Vanilla extract, Honey
Protein and Fats - Nuts and seeds for toppings

Toss the ingredients in, blend and you are all set! It’s super easy, super light, super refreshing and a very healthy smoothie recipe.

Hope you love this healthy breakfast smoothie recipe. Let me know in the comment section below!
Much love!
X


IF YOU LOVED THIS RECIPE, YOU'LL DEFINITELY LOVE:


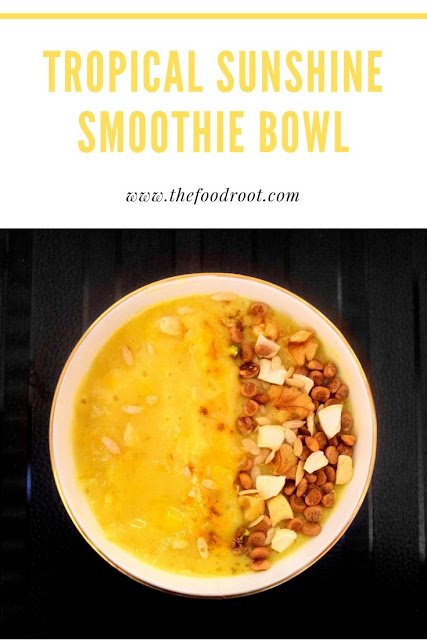
TROPICAL SMOOTHIE


The tropical flavors of this sunshine smoothie is refreshing and loaded with amazing flavors and fresh fruits.. This delicious smoothie can be made in less than 5 minutes.


MANGO BLUEBERRY SMOOTHIE


Serves : 2 People
Preparation time : 5 minutes
Total time : 5 minutes
Author : The Food Root

Ingredients


2 fresh ripe mangoes
1/2 cup fresh blueberries
1/2 cup plain or greek yoghurt
1/2 cup almond milk
1 teaspoon, vanilla extract
2-3 tbsp water (optional)
1 tsp honey or maple syrup
3-4 pieces crushed ice (optional)


Garnish with your choice of fruits, nuts and seeds.

I added -
2 almonds, crushed
2 walnuts, crushed
2 pistachios, crushed
1 tbsp, pomegranate seeds
1 tbsp, cantaloupe seeds

Method


1. Peel the mangoes & cut them into small pieces.

2. In a blender, combine mango chunks, blueberries, greek yogurt, almond milk, vanilla extract and water. Blend for 2-3 minutes, until smooth.

3. Add a little sweetener - honey or maple syrup, if you like.

4. Add crushed ice and blend again for 2-3 minutes.

5. Pour the mango blueberry smoothie in a bowl and garnish with your favourite toppings like fruits, nuts and seeds. Serve fresh and enjoy! 


Notes


1. If you want to keep your smoothie vegan, you can use coconut, hemp, soy or almond milk else you can also use the nonfat milk.

2. If you prefer a thicker consistency, use less liquid. If you prefer a thinner consistency, add a little more liquid.

3. You can also add frozen fruits or add crushed ice to make your smoothie slightly slushy.

Wednesday, October 24, 2018

Shahi Tukda Recipe | How To Make Shahi Tukda?


Shahi Tukda is a rich and creamy Indian dessert, where fried bread pieces are dipped in cardamom flavored milk syrup, layered and finished off with some crushed almonds, cashews and pistachios. Check out the step by step pictures for the full detailed recipe.


Shahi Tukda is a rich and creamy Indian dessert, where fried bread pieces are dipped in cardamom flavored milk syrup, layered and finished off with some crushed almonds, cashews and pistachios.


Diwali festivities has officially begun, and it's the nationwide excuse to indulge in the delicious treats of this season. Shahi Tukda is a perfect dessert to celebrate Diwali or any other occasion, cook it up as an after-meal dessert at home and enjoy. Be it adult or kid, no-one can resist this irresistibly rich yet light simple dessert.

Shahi Tukda is a traditional dessert from the royal city of Hyderabad. It's a perfect fall season dessert with rich flavors and takes less than 20 minutes to prepare! A favorite at holidays and a treat to serve your guests for any get together you are throwing or any special occasion for your family

Shahi Tukda is one is the easiest dessert which any beginner can try and enjoy. It has a beautiful aroma and is quite hard to resist. This dessert is made with 5 main ingredients milk, sugar, bread, nuts and cardamom. The flavor of this dessert comes from cardamom. You can also add pinch of saffron or a tablespoon of rose essence to the syrup.


Shahi Tukda is a traditional dessert from the royal city of Hyderabad. It's a perfect fall season dessert with rich flavors and takes less than 20 minutes to prepare!


Some people like their Shahi Tukda crisp but some people like it really soft. I usually like the soft version so i skip making the sugar syrup, but, if you are someone who like a nice crunch, then you can make a sugar syrup alternatively and dunk the toasted breads into it, for around 20-30 seconds.

I started with making flavored thickened milk syrup (rabri) by simmering the full cream milk on the stove and flavored it with cardamom and rose essence, and, the end result was far better than what i thought. Everyone in my family just loved it. You can also use condensed milk or milk powder but I prefer making the rabri with full cream milk.

Toast or deep-fry the bread pieces in a clarified butter, dip them into the prepared thickened milk syrup and arrange them on a serving plate. Sprinkle some nuts on top. Freeze for 30 minutes, then serve.


HOW TO MAKE SHAHI TUKDA (STEP BY STEP)


1. Boil 4 cups of milk in a saucepan. Once it's boiled, add sugar, cardamom and rose essence for flavor and mix it well. Add in the dry fruits, and stir continuously till the mixture started to reduce and thickened. Turn off the flame.


Boil milk in a pan. Add sugar, dry-fruits, cardamom and rose essence for flavoring and mix it well. Stir continuously till the mixture started to thickens.


2. Cut 6 bread slices into diagonal shape. Heat one tablespoon of butter in a non-stick skillet over medium heat. Cook the bread from both the sides till it becomes golden brown.


Toast or deep-fry the bread slices in clarified butter.


3. Dip the the bread toasts into the prepared thickened milk syrup and arrange them on a serving plate. Sprinkle some dry-fruits on top. Freeze for 30 minutes, then serve.


Dip the the bread toasts into the prepared thickened milk syrup and arrange them on a serving plate. Sprinkle some dry-fruits on top and serve.


I hope you enjoy this recipe! Let me know what y'all think!
Don't forget to sign up for the email updates to get the new recipes delivered right to your inbox. Also, follow us on PinterestInstagramFacebookTwitterGoogle+


SHAHI TUKDA RECIPE


Yield: 4 Servings
Preparation time: 5 minutes
Cooking time: 20-30 minutes
Author: The Food Root

Ingredients

6 Freshly Baked White Bread Slices, Purchased or Homemade
4 cups Full cream Milk or Condensed Milk
1/2 cup Sugar
1 tablespoon Rose essence (optional)
5 tablespoon Butter, room temperature
5-6 Cardamom pods, crushed
5-6 Almonds, sliced
5-6 Pistachios, chopped
Chopped mixed nuts for garnishing

Method

1. Heat milk in a non-stick pan. Stir and bring it to boil till it reduces half of its quantity. Add sugar, cardamom pods and rose essence for flavor and mix it well. Add in the crushed pistachios and almonds, and, stir occasionally to avoid milk sticking to the pan. Once it's reduced and thickened, turn off the flame and let it cool down to the room temperature.

2. Remove the edges of the bread with the knife and cut them into diagonal shape. Heat one tablespoon of butter in a non-stick skillet over medium low heat. Place the bread and cook it from the both the sides till it becomes crisp and golden brown.

3. Dip each crispy bread piece into the prepared thickened milk syrup for about 20 seconds and arrange them into the serving plate.

4. Pour the remaining milk syrup over the pudding. Sprinkle some pistachios and cashews over it. Freeze for 30 minutes, then serve.

Notes

1. Add sugar as per your taste.
2. For more flavoring, you may add a pinch of saffron to the milk syrup.
3. Instead of soaking the balls in sugar syrup, they are soaked in thickened milk syrup.
4. You can serve it warm or refrigerate it for later.

Friday, March 24, 2017

PISTACHIO ICE-CREAM


how to make homemade pistachio ice-cream

There's nothing better than a frosty scoop of homemade pistachio ice cream. 

Ice cream is loved by everyone, it's one of the most popular desserts of all little toddlers and all the grownups. For some grown up kids it's a must have staple in the fridge. A tub of ice cream brings back the fond memories of happier and carefree days, it gives an instant mood-uplift but hey, you don't always have to buy ice creams from the market, you can make these yummy desserts at home!! They are way much easier to make, than most people think.

Churned with generous amount of pistachios and dusted with almonds, this is hands down the best homemade pistachio ice cream you'll ever eat. It's thick, creamy and provides much joy when the climate doesn't. I made this yesterday and I'm craving for one badly right now. Of course, I had to share this with you!

This ice cream is made with 4 main ingredients - milk, cream, sugar and tons of pistachios. I used milk and cream in 2:1 ratio. I didn't added any food coloring, so my ice cream was light green in color. However you can add few drops of artificial food coloring, if you want!

This is best homemade ice cream which I've eaten recently. Chunks of pistachios, almonds and homemade whipped cream were added to gave this ice cream a wonderful texture and flavor. So may I present you, easy to make, vegetarian pistachio ice cream recipe!! It's heavenly!!


PISTACHIO ICE CREAM


Preparation time: 15 minutes
Cooking time: 30 minutes
Serves: 6-7 people
Author: The Food Root

INGREDIENTS
4 cups - Milk
1 cup - Heavy Cream
1 cup - Sugar
1 cup - Pistachio, roasted and salted
2 tablespoons - Almonds (optional)

For whipped cream:
1 cup - Heavy cream
1 teaspoon - Salt
1 teaspoon - Sugar

DIRECTIONS
1. Chop or grind pistachios in a processor and keep it aside.

2. Combine milk and sugar in a saucepan over medium-high heat and bring to a gentle boil. Continue to stir, till the sugar dissolves completely.

3. Add the ground pistachio mixture in the pan.

4. Reduce the heat and let simmer for 5-6 minutes. Stir it constantly, until the mixture starts to thicken slowly. Do not boil. Remove the heat and let cool for sometime.

5. Pour it into the container or a bowl and place it in the refrigerator for at least an hour.

6. Now, let's prepare the homemade whipping cream:

(Always remember that, the colder and heavier the cream is, the easier it is to whip)
  • So our first step is to place the empty bowl in a freezer for a quick chill. 
  • Than, pour cold, heavy cream in the bowl and add a pinch of salt and sugar.
  • Whisk for 2-3 minutes or till it's well blended. Set it aside.

7. Next remove the (milk, sugar and ground pistachio mixture) container from the refrigerator after an hour, than add homemade whipped cream followed by 1 cup of heavy cream and whisk to combine.

8. Add 2 tbsp of crushed pistachio and/or almonds, mix gently.

9. Then cover the container with plastic wrap. Refrigerate it again, for 2-3 hours or till it's well set.

10. Scoop the ice cream into the bowl and top the ice cream with syrup or serve it plain.

11. Enjoy!! ;-)

NOTES
1. I used roasted and salted pistachios, however you can you use raw too.
2. I didn't added any food coloring, so my ice cream was light green in color. However you can add few drops of artificial food coloring, if you want!
3. You can adjust sugar as per your taste.

Saturday, February 4, 2017

DRY FRUIT CUSTARD

Dry fruit custard is a simple recipe and made up with few ingredients: milk, sugar, dry fruits and custard powder.


Dry Fruit Custard - Dry fruit custard is a simple recipe and made up with few ingredients: milk, sugar, dry fruits and custard powder.


Dry Fruit Custard is my new favorite dessert. I can have this all day and night. It's a sweet treat at the end of your dinners or even when you're planning to make a dessert for big dinner party or for your family and friends. I've been making this so much lately, had to share the recipe with you. This frozen custard exactly taste like an ice cream. It's so good and so easy that if you eat and try this delightful dessert once, you'll make it all the time.

There are quite a few methods of making custard but I usually make it with the custard powder. I'm using vanilla flavored custard powder. I like this dessert from my childhood days. This is my go-to custard recipe, and yes - it's eggless!!

Dry fruit custard is a simple recipe and made up with few ingredients: milk, sugar, dry fruits and custard powder. Every spoonful of this dessert delivers a creamy, smooth texture with a rich taste of vanilla flavor. The best thing about this is, it doesn't requires baking. It's a very soft and creamy dessert.

You can eat a warm freshly made custard or you can refrigerate it for later. You can even play with the flavors of custard by using fruits, dry-fruits, chocolate, paan or anything you like.

Treat your guests or make for your family. This mouthwatering dessert is one of the best treats for your friends and family!! It's the most easiest dessert to make and it's healthy too!!

I have followed a very simple custard making recipe that only uses milk, sugar, dry fruits and custard powder (vanilla flavor). Do try it, it's very delicious!


Dry Fruit Custard - first chop all the dry fruits like cashew, raisins, pistachios and almonds and keep it aside.

First chop all the dry fruits - cashew, raisins, pistachios and almonds and keep it aside.

Dry Fruit Custard - Now, heat 4 cups of milk in a saucepan and let it boil. After 4-5 minutes, add 1 cup of sugar and stir it for 2 minutes.


Now, heat 4 cups of milk in a saucepan and let it boil. After 4-5 minutes, add 1 cup of sugar and stir it for 2 minutes.

Dry Fruit Custard - Meanwhile, take a bowl and add 4 tablespoon of custard powder, 3 tablespoon of warm milk or water and mix it together. Make sure the custard paste is smooth.


Meanwhile, take a bowl and add 4 tablespoon of custard powder, 3 tablespoon of warm milk or water and mix it together. Make sure the custard paste is smooth.


Dry Fruit Custard - Next, add the custard paste in the hot boiling milk. Keep stirring until there are no lumps.


Next, add the custard paste in the hot boiling milk. Keep stirring until there are no lumps.

Dry Fruit Custard - Add in the dry fruits. Mixture will start to thicken slowly. Continue stirring and bring it to boil and switch off the flame.


Add in the dry fruits, followed by crushed cardamom pods (seeds removed) and stir it for 2-3 minutes. Mixture will start to thicken slowly. Continue stirring and bring it to boil and switch off the flame.


Dry Fruit Custard - Now transfer the custard into the bowls. garnish them with the remaining chopped dry fruits. Let it cool. Refrigerate it and serve chilled.


Now transfer the custard into the 6-7 medium size bowls and garnish them with the remaining chopped dry fruits. Let it cool and then refrigerate it for 3-4 hours. Serve chilled.


Dry Fruit Custard - Dry fruit custard is a simple recipe and made up with few ingredients: milk, sugar, dry fruits and custard powder.


DRY FRUIT CUSTARD


Preparation time: 2 minutes
Cooking time: 15 minutes
Serves: 6-7 people
Author: The Food Root

Ingredients
4 cups : Milk
1 cup : Sugar
3-4 tablespoon : Custard Powder
8-10 pieces : Cashews
8-10 pieces : Raisins
8-10 pieces : Pistachio
10-12 pieces : Almonds
3-4 pieces : Cardamom

Method
1. First chop all the dry fruits - cashew, raisins, pistachio and almonds and keep it aside.
2. Now, heat 4 cups of milk in a saucepan and let it boil.
3. After 4-5 minutes, add 1 cup of sugar and stir it for 2 minutes.
4. Meanwhile, take a bowl and add 4 tablespoon of custard powder, 3 tablespoon of warm milk or water and mix it together. Make sure the custard paste is smooth.
5. Next, add the custard paste in the hot boiling milk. Keep stirring until there are no lumps.
6. Add in the dry fruits, followed by crushed cardamom pods (seeds removed) and stir it for 2-3 minutes. Mixture will start to thicken slowly. Continue stirring and bring it to boil. Switch off the flame.
7. Now, transfer the dry fruit custard into the 6-7 medium size bowls and garnish them with the remaining chopped dry fruits.
8. Let it cool and then refrigerate it for 3-4 hours. Serve chilled.

Notes
1. Adjust the quantity of custard powder as per the thickness you need.
2. Add sugar as per your taste.
3. You can play with with flavors of custard by using fruits, dry fruits, chocolate, paan or anything you like.
4. You can eat a warm freshly made custard or you can refrigerate it for later.
5. Adding Cardamom pods in custard is optional. You can leave it if you don't like the flavor of cardamoms.