Friday, December 17, 2021

How to make Peanut Chutney at Home | South Indian Groundnut Chutney Recipe


Peanut chutney is a South Indian Chutney which is made with Peanuts, chana dal, ural dal. It is a vegan chutney which goes well with dishes like Dosa, Medu vada, Upma, Uttapam, Pongal etc.


How to make Peanut Chutney at Home | South Indian Groundnut Chutney Recipe


Peanut Chutney is a vegan substitute for coconut chutney. This chutney can be made without using coconut. It is made by using peanuts, chana dal, ural dal for getting the white color. 

You can adjust the quantity of water in the blender as per your desired consistency. It goes well with Dosa, Medu vada, Upma, Uttapam, Pongal etc.


Is Tempering of Peanut Chutney needed?

This chutney needs no tempering. But in case if you want to temper the Peanut chutney. Heat 1 tbsp of oil, and add pinch of mustard seeds, cumin seeds, dried kashmiri mirch, asafoetida and fresh curry leaves and pour it to the chutney.


Is Peanut Chutney Healthy?

Yea, Peanut chutney is one of the healthiest chutney if eaten in moderation. It is rich in protein, fiber and healthy fats. It is a great source of vitamins, minerals and nutrients.


What is the Shelf life of Peanut Chutney?

Store Peanut Chutney in an airtight container. Than you can refrigerate it for about 3-4 days.


Can you Reheat Peanut Chutney?

No, you cannot reheat peanut chutney. Chutneys are not meant to be reheat cuz they are strong and flavored with whole spices, herbs, oil.


What to Serve Peanut Chutney with?

You can try Peanut Chutney with Dosa, Medu Vada, Idli, Uttapam, Tikki, Appe, Pongal etc.


How to make Peanut Chutney at Home | South Indian Groundnut Chutney Recipe


Preparation Time: 5 minutes
Preparation Time: 15 minutes
Author: The Food Root


Ingredients

1 tbsp Oil
1/2 cup peanuts (groundnuts), skin removed
1 tbsp Chana Dal (Split Chickpeas Gram)
1 tbsp Urad Dal (Split and Skinned Black Gram)
1 Green Chilli (as per your spice level)
4 -5  curry leaves
Salt to taste


Method:


1. Add peanuts in the non-stick pan. Roast them on low fame for 2-3 mins. Switch off. Let it to cool down. Than rub peanuts between your hands by applying a little pressure so that the outer skin starts to come off easily.

2. Next, add oil in a pan, and roast chana dal and urad dal until it turns golden. Add curry leaves, green chilli and salt. Saute it for 2-3 minutes.

3. Add all these ingredients in the blender. Pour enough water and blend the chutney and bring it to your desired consistency.

4. Serve peanut chutney with South Indian dishes like Dosa, Medu vada, Upma, Uttapam, Pongal etc.


Notes:


1. The consistency of Peanut Chutney is thick, but if you want a thinner consistency, you can add little water in the blender and adjust as per your desired consistency.

2. Tempering the peanut chutney is totally optional.

3. Roast peanuts, when they cool down. Rub peanuts between your hands so that the outer skin starts to come off easily.


Click the link on other South Indian dishes like:


Medu Vada

Rava Dosa

Sambhar

Coconut Chutney

Mint chutney 

Onion-tomato chutney


How to make Peanut Chutney at Home | South Indian Groundnut Chutney Recipe


Tuesday, December 7, 2021

How to make Spiced, Onion-Tomato Chutney at Home


South Indian Spiced, Onion-Tomato based dip is a Chutney with bright red vibrant texture and a nutty flavour and taste.


How to make Spiced, Onion-Tomato Chutney at Home


This Spiced Onion-Tomato Chutney is an easy side dish which goes well with various South Indian recipes like Dosa, Medu Vada, Idli, Bonda, Upma and so on.

This is a Chutney which does not need coconut in it. It literally takes 5 minutes regardless what you are making and it tastes terrific.

This Chutney can be made spiced or hot, depending on the number of Dried Kashmiri Red Chillies used.

The main ingredients of this chutney are Dried Kashmiri Red Chillies, Onions and Tomatoes. Apart from that I used oil, urad dal, chana dal, green chilli, garlic, ginger, asafoetida powder, mustard seeds, cumin seeds, salt, coriander powder, handful of cilantro, little water and lots of curry leaves.

Basically all these ingredients are easily available at our homes. So assemble all these ingredients on the table and start making this delicious Chutney with the simple procedure. 

Heat oil in pan, add asafoetida powder, mustard seeds, cumin seeds and sauté. Add urad dal, chana dal followed by Kashmiri red chilli and fry until it’s golden brown. Add garlic cloves, ginger and curry leaves, fry on low flame. Add onions, tomatoes, green chilli, salt, coriander powder, cilantro and mix it well. Sauté it for 5 minutes on low flame. Switch off the flame. 

Remove the mixture from the flame, let it cool down. Grind to make a smooth paste, a little water may be needed and your Spiced Onion-Tomato Chutney is ready.

I generally add no water or just 1/4 cup of water in the while grinding the Chutney in the food processor.

Mainly the consistency of Onion-Tomato Chutney is thick, but if you want a thin consistency, you can go ahead and add little water in the blender and adjust as per your wish.

You can serve the Chutney with any South Indian dish like Dosa, Idli, Medu Vada, Uttapam, Pongal etc.

This chutney will last for about 2-3 days in an airtight container in the refrigerator.

You can also have a look on our other dips specifically coconut chutney, mint chutney, peanut chutney, onion-tomato chutney which goes well with all the South-Indian dishes. Click a link and enjoy it.


Click the link on other South Indian dishes like:


Medu Vada

Rava Dosa

Sambhar

Coconut Chutney

Mint chutney 

Peanut chutney 


How to make Spiced, Onion-Tomato Chutney at Home


How to make Spiced, Onion-Tomato Chutney at Home


Preparation Time: 5 minutes
Cooking Time: 5 minutes
Grinding Time: 2 minutes
Serves: 6-8 People
Author: The Food Root


Ingredients:


2 tbsp Oil
1 tbsp Urad Dal (Split and Skinned Black Gram)
2 tbsp Chana Dal (Split Chickpeas Gram)
3 - 4 Sukhi Lal Mirchi (Kashmiri Lal Mirchi)
1 Green Chilli, chopped
2 Onions, chopped
4 Tomatoes, chopped
3-4 garlic cloves, chopped
1 long ginger, grated
1 tbsp. mustard seeds
1 tsp, cumin seeds
8-10 curry leaves
pinch of hing (asafoetida)
2 tbsp, coriander powder 
Salt to taste
handful of cilantro leaves
1/4 cup water


Method:


1. Heat oil in a pan over medium flame and add asafoetida powder. Add mustard seeds, let it splutter. Add in the cumin seeds and sauté.

2. Add urad dal and chana dal followed by Kashmiri red chilli to give a red vibrant color and fry until it’s golden brown. Sauté till you get the rich aroma from the lentils.

3. Add garlic cloves, ginger and curry leaves and fry on low flame for 1 min.

4. Add in the onions, tomatoes, green chilli and sauté it for 5 minutes on low flame

5. Add salt, coriander powder, cilantro and mix it well. Switch off the flame.

6. Remove the mixture from the flame, let it cool down. Grind to make a smooth paste, a little water may be needed and your Spiced Onion-Tomato Chutney is ready.

7. Serve with any South Indian dishes like Dosa, Idli, Medu Vada, Uttapam, Pongal etc.


Notes

1. You can make this Chutney more spicy by adding more Chillies.

2. To increase the shelf life of this Chutney, keep it refrigerated.

3. Mainly the consistency of Spiced Onion-Tomato Chutney is thick, but if you want a thin consistency, you can go ahead and add little water in the blender and adjust as per your wish.

4. It tastes best with Dosa, Idli, Medu Vada, Upma, Uttapam, Pongal etc.


COCONUT CHUTNEY

Coconut chutney is an amazing combination of coconut, roasted split grams, coriander leaves, ginger, and seasoned with the aroma of mustard seeds and curry leaves.  It's served as an accompaniment with South Indian dishes like Idli, Dosa, Vada.

Coconut chutney is a delicious South Indian appetizer with lots of sweet, savory and nutty flavor. It's one of the most famous condiments in the southern part of India. It's served as an accompaniment with South Indian dishes like Idli, Dosa, Vada, Uttapam, Upma, Flavored Rice and Pongal. If you love eating traditional South Indian food, then you should definitely consider making this chutney.

Coconuts are known for their versatility, and are frequently used in food, cosmetics and pharmaceutical products. They are a part of daily diet of many people living in the tropical and subtropical regions. They also have a religious and cultural significance in Hindu societies. Coconuts are easily grown and most widely available crop across the world. They are highly nutritious, rich in fiber, and packed with vitamins and minerals.

Coconut chutney is an amazing combination of coconut, roasted split grams, coriander leaves, ginger, and seasoned with the aroma of mustard seeds and curry leaves. It's a very straightforward recipe. All you need is few simple, easily available ingredients and you are ready to go.

You can refrigerate and use the chutney for 3-4 days but it's not advisable to store it for longer than a few days because the coriander and coconut will oxidize rapidly and will change it's color, so it's better to consume it fresh. If you want a little sourness in the chutney you can add 1 tablespoon of tamarind or 2 tablespoon of yogurt and grind with rest of the ingredients. Always remember to season the chutney with mustard seeds and curry leaves for a nice essence. We love to add curry leaves as it has this pungent lemony flavor, which changes the flavor of the whole dish.

The chutney taste extremely delicious when prepared with few right spices and ingredients. The flavor of the chutney can be adjusted according to your preference but I would recommend you to try with the given quantities first. 


Click the link on other South Indian dishes like:

Medu Vada

Rava Dosa

Sambhar

Mint chutney 

Peanut chutney 

Onion-tomato chutney


COCONUT CHUTNEY


COCONUT CHUTNEY

Serves: 6-8 People
Preparation time: 10 minutes
Cooking time: 10 minutes
Author: The Food Root


INGREDIENTS

1 - Fresh Coconut, grated
2 tablespoons - Roasted split gram or chana dal
3-4 springs - coriander leaves
1/2 inch - ginger, grated
2 - Green chillis, chopped
1/2 cup - water or as needed
1/2 teaspoon - Sugar
1/4 teaspoon - Cumin powder
1/4 teaspoon - Black pepper
1/2 teaspoon - Salt

Tempering

1 tablespoon - Olive oil
1 tablespoon - Mustard seeds
4-5 Curry leaves, crushed
pinch of asafoetida


DIRECTIONS

1. Dry roast split gram (chana dal) until browned, allow it to cool and keep it aside.

2. Roughly cut the coconut into small pieces or grate it then put it in the food processor with little bit of water and grind coarsely.

3. Once done, add roasted split gram, coriander leaves, ginger, green chillis, sugar, cumin powder, salt and black pepper, some more water (if needed), and grind into a fine paste.

4. For seasoning, heat the olive oil, in a medium sized pan, or a small ladle. Add the mustard seeds and allow it to crackle. When the seeds started to crackle, add curry leaves and pinch of asafoetida and stir it for few seconds. Switch off the gas and pour the hot seasoning over the ground chutney, mix well and serve!

NOTES

1. You can refrigerate and use the chutney for 3-4 days but it's better to consume it fresh.

2. Choose curry leaves that are bright, dark green without the signs of browning.

3. For grinding all the ingredients, use as little water as possible.

4. The final consistency of chutney must be somewhere between coarse and paste.

5. If you want a little sourness in the chutney, you can add 1 tablespoon of tamarind or 2 tablespoon of yogurt and grind with rest of the ingredients.


Tuesday, November 2, 2021

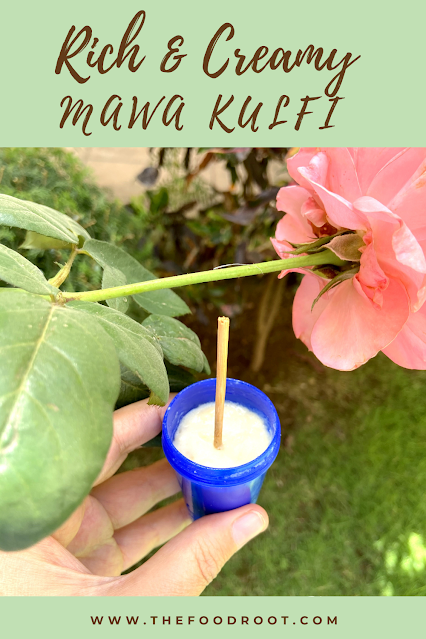
3 Ingredient Mawa Kulfi | How to make Khoya Kulfi


With just 3 ingredients, milk, sugar and mawa, you can make these simple creamy, frozen refreshing kulfis.


3 Ingredient Mawa Kulfi | How to make Khoya Kulfi


Kulfi made by just 3 ingredients - milk, sugar and mawa/khoya (dried evaporated milk solid). You can also add dry fruits, cardamom powder in the kulfi which is totally optional.

Cardamom powder imparts a lot of flavour and taste to the Kulfi. It looks extra delicious with crushed dry fruits over the top. This is surely the easiest dessert recipe to try at home.

Khoya or Mawa is dried evaporated milk solid which is used in the Indian dessert. It’s a popular traditional dessert (mithai) in India and other neighbouring countries.


3 Ingredient Mawa Kulfi | How to make Khoya Kulfi


The trick is to stir the milk continuously so that no lumps of crumbled mawa or khoya are found while making the Kulfi mixture on lower flame. Also, add sugar in the end and stir it in last few minutes.

From start to finish the preparation of making the Kulfi takes less than 30 minutes. Refrigerate upto 4-5 hours or overnight and enjoy with your family and guests! They will definitely love it.

Well, who doesn’t love kulfis, from kids to adults, everyone does. You can enjoy eating this kulfis from road side vendors with dozen of different flavours, but this was the first time my mom and I tried making it, and guess what, it turns out so delicious that we made it so many times in our home.


How to make Kulfi?


1. In a wide pan, heat 4 cups of milk on lower flame and let it boil, or until it reduces to half.


3 Ingredient Mawa Kulfi | How to make Khoya Kulfi


2. Once milk thickens, add crumbled khoya and keep stirring the milk occasionally, so that no lumps are formed. Keep stirring for about 10-12 minutes on low to medium flame. Next, add 1 cup of sugar and stir it until the sugar is completely dissolved.


3 Ingredient Mawa Kulfi | How to make Khoya Kulfi


3. Next add crushed dry fruits, pumpkin seeds, followed by crushed cardamom pods, mix everything. Keep on stirring for about 2-4 minutes. Switch off the flame.


3 Ingredient Mawa Kulfi | How to make Khoya Kulfi


4. Remove it from the flame and keep it aside. Let the mixture cool for about 10 minutes.


3 Ingredient Mawa Kulfi | How to make Khoya Kulfi


5. Pour the cold liquid mixture into Kulfi moulds.


3 Ingredient Mawa Kulfi | How to make Khoya Kulfi


6. Cover the Kulfi moulds with aluminium foil or plastic lid which comes with it, or you can also insert the ice cream stick, or whatever suits you the best.


3 Ingredient Mawa Kulfi | How to make Khoya Kulfi


7. Refrigerate the Kulfi for atleast 4-5 hours or overnight.


3 Ingredient Mawa Kulfi | How to make Khoya Kulfi


8. Serve Kulfi immediately and garnish them with the remaining chopped dry fruits.


How to refrigerate the Kulfi mould?


1. You can cover the mold with aluminium foil or plastic lid which comes with it, or you can also insert the ice cream stick, or whatever suits you the best. 
                                              
2. To remove the popsicles, allow it to remain in the room temperature and rub with your hand on outside of the mold until the ends are loose.

3. Serve Kulfi immediately and garnish them with the remaining chopped dry fruits.


If you enjoy the recipe, do pin this delicious dessert.


3 Ingredient Mawa Kulfi | How to make Khoya Kulfi


3 Ingredients Mawa Kulfi | How to make Khoya Kulfi


Cooking time: 30 minutes
Refrigeration time: 4-5 hours
Serves: 7-8 People
Author: The Food Root


Ingredients:


4 cups full fat whole milk
4-5 tablespoon khoya/mawa (dried evaporated milk solid)
4 tablespoon sugar
Optional -
10-12 crushed pistachios
10-12 crushed almonds
10-12 crushed cashews
2 tablespoon Pumpkin seeds
4 crushed cardamom pods


Method:


1. In a wide pan, heat 4 cups of milk on lower flame and let it boil, or until it reduces to half.

2. Once milk thickens, add crumbled khoya and keep stirring the milk occasionally, so that no lumps are formed.

3. Keep stirring for about 10-12 minutes on low to medium flame.

4. Next, add 1 cup of sugar and stir it until the sugar is completely dissolved.

5. Next add crushed dry fruits, pumpkin seeds, followed by crushed cardamom pods, mix everything. Keep on stirring for about 2-4 minutes. Switch off the flame.

6. Remove it from the flame and keep it aside. Now, let the mixture cool for about 10 minutes.

7. Pour the cold liquid mixture into Kulfi molds.

8. Refrigerate the Kulfi for atleast 4-5 hours or overnight.

9. Serve Kulfi immediately and garnish them with the remaining chopped dry fruits.


How to refrigerate the Kulfi mould?


1. You can cover the mold with aluminium foil or plastic lid which comes with it, or you can also insert the ice cream stick, or whatever suits you the best.

2. To remove the popsicles, allow it to remain in the room temperature and rub with your hand on outside of the mould until the ends are loose.

3. Serve Kulfi immediately and garnish them with the remaining chopped dry fruits.


I love this recipe a lot, do pin if you love it.


3 Ingredient Mawa Kulfi | How to make Khoya Kulfi


Notes:


1. You can also add a pinch of saffron to add aroma and flavor in the dessert.

2. Adding nuts or cardamom powder is totally optional.


Tuesday, September 7, 2021

Healthy Pav Bhaji | How To Make Healthy Pav Bhaji


The delicious healthy Pav Bhaji


Pav Bhaji is a delicious combination of thick vegetables which are mashed together and served with Pav also known as buns.


Healthy Pav Bhaji | How To Make Healthy Pav Bhaji


‘Pav’ means buns and ‘Bhaji' means vegetable dish, and are eaten together. Pav Bhaji is the most comforting and hearty meal and is worth enjoying any time of the day. This dish is much loved in the Maharashtra region of India.


It is extremely flavorful dish and is served in almost all the restaurants and food joints, streets, canteens across the country. It’s the most famous street food in India.


Well, I’m making the healthy version of Pav Bhaji. It taste exactly like the street version which includes lots of vegetables rich in fiber, vitamins and minerals.


It’s an all time favorite staple at our home. Make this bhaji with whatever veggies that are available in the season. Since mine is healthy version, and I wanted green veggies for my Bhaji, thankfully it was available in the season.


Healthy Pav Bhaji | How To Make Healthy Pav Bhaji


To make the healthy version of Pav Bhaji, I added all the green veggies like cauliflower, lauki (bottle gourd), tinda (ridge gourd), torai (apple gourd), brinjal, green beans. Carrots and beetroot for color and potatoes for taste. 


It is highly nutritious because green veggies contains lots of iron and protein. It's a wonderfully delicious and nutritious dish. It's rich in fiber, vitamins, minerals and anti-oxidants.


Making healthy Pav Bhaji is also a great idea for kids since they run away from green veggies. Your kids will definitely have a smiley face after tasting this and than gobble it up for sure.


Pressure cook all the veggies, mash them with a masher. Sauté onions in a pan and prepare the tomatoes puree, add all the green veggies, mix and a dollop of butter on the top with some fresh chopped onions and lemon juice to make the Bhaji delicious and serve along with pav or buns. Cut the buns from between and toast it on pan with butter from both the sides.


You can also add Kashmiri Lal mirch and Pav Bhaji Masala to give a nice red color. But I substituted it with cumin powder or homemade Masala powder.


The Pav are toasted in butter and are eaten along with Bhaji. The taste, aroma, flavors are super delicious so do give it a try.


You can pin this recipe if you like it.


Healthy Pav Bhaji | How To Make Healthy Pav Bhaji


HEALTHY PAV BHAJI | How To Make Healthy Pav Bhaji


Preparation time: 20 minutes
Cooking time: 40 minutes
Serves: 6 People
Author: The Food Root 


Ingredients


For cooking Bhaaji


2 cups of water
1/2 size Lauki (bottle gourd)
3 medium size Tinda (ridge gourd)
3-4 medium size Torai (apple gourd)
1/2 cup French beans
1/2 cup cauliflower florets
1/2 cup Green peas
1 Beetroot (optional)
1 small Brinjal
4 medium size Carrots
4-5 medium size Potatoes


For Tempering


2 tbsp - clarified butter
2 tbsp - butter
pinch of asafoetida
1/2 tbsp - crushed cumin seeds
1 inch long - ginger, grated
5-6 garlic cloves, chopped
3 medium size onions
4-5 medium size tomatoes
1 Capsicum
3 green chillies, chopped
2 medium size onions - chopped
4 medium size tomatoes - chopped
1/2 tbsp - Red chili powder
1/2 tbsp - Turmeric powder
1/2 tbsp - Coriander powder
1/2 tbsp Garam masala
1/2 tbsp - Mango powder
1 1/2 - Salt to taste
chopped coriander leaves


For Serving


1/2 cup finely chopped onions
2 lemon wedges


For the Buns


8-10 Pav (Buns)
4-5 Butter


Method


1. Chop all the veggies : Rinse, peel and chop all the veggies like potatoes, carrots, cauliflower, bottle gourd, ridge gourd, apple gourd, brinjal, green beans, beetroot and add them in the pressure cooker.


2. Pressure cook all the veggies : Add 2 cups of water. Pressure cook it for 3-4 whistles on medium flame.


3. Mash the Bhaji : Switch off the flame and remove it. Wait for the pressure to release completely before opening the cooker. Next, open the lid and mash the bhaaji with wooden or aloo masher. Do not make a smooth paste, coarsely mash it.


4. Sauté onions and garlic in a pan : Heat 2 big tbsp of clarified butter or oil and 2 tbsp of butter. Add cumin seeds and a pinch of asafoetida powder. After it crackles, add finely chopped garlic cloves, add grated ginger and fry them for 40-50 seconds. Next, add chopped onions and stir it. Keep stirring and adjusting the flame so that onions cook slightly golden brown.


5. Prepare the tomato puree tempering : Add chopped tomatoes and sauté it for around on 7-8 minutes on low-medium flame. Next, add the spices - Red chili powder, Turmeric powder, Coriander powder, Mango powder and Salt to taste. Stir it well. Let the mixture cook, till the oil separates.


6. Add the cooked bhaaji in the pan : Now add the cooked bhaji in the pan. Add hot water if needed to adjust the consistency. Stir it for another 8-10 minutes on low/medium flame. Add garam masala and mix it well. Add 1/2 cup of green peas. Add 2 tbsp of butter and mix it well. Garnish with coriander leaves. Turn off the heat and remove it.


7. For the Pav : Slit the Pav or buns horizontally with knife on low flame. Heat butter on the frying pan and place the Pav, toast it for 1 or 2 mins from both sides until it’s slightly crisp.


8. Serve and Garnish : Now, transfer the bhaji to a serving bowl and serve the Bhaji. Since it is so much healthier just top it with butter on Bhaji. Serve bhaji with Pav or Buns and enjoy it with onions, lemons.


Notes


You can also add Kashmiri Lal mirch and Pav Bhaji Masala to give a nice red color.


You can also add Garam Masala and Red Chilli Powder which is normally available in all the super markets instead of Kashmiri Lal Mirch and Pav Bhaji Masala.


Monday, July 12, 2021

Top Nutritional and Health Benefits of Bananas


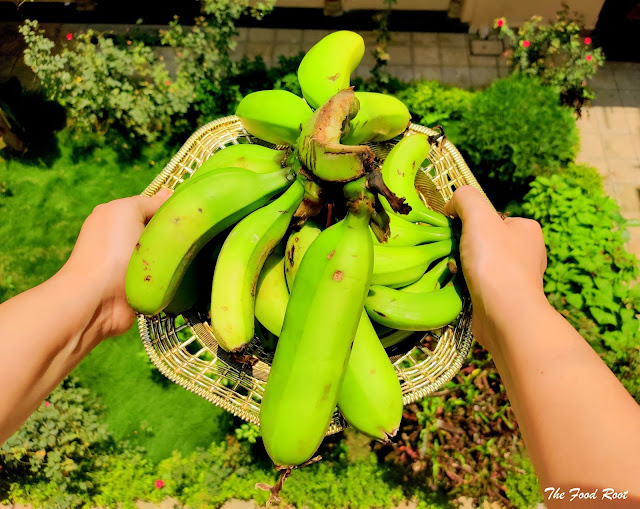
Found some homegrown bananas growing in my courtyard garden. I love bananas mainly because of its sweet taste, nutritional benefits, health benefits also because it makes you feel full and energetic for a longer period of time.

Gardening helps you so much to connect with nature. Isn’t it funny, how much satisfaction you get from growing your own fruits and vegetables?

Banana is one superfood that is commonly available across the globe. I love this fruit as it provides you instant energy to kickstart your day.


Top Nutritional and Health Benefits of Bananas


Here are the Top Nutritional and Health Benefits of Bananas;

Bananas are highly nutritious


1. There is 110 calories in single banana with zero fat.

2. Bananas are rich in Potassium, Vitamin B6, Vitamin C, Vitamin A, Iron and Manganese.

3. Packed with fibre, it provides lots of energy.

4. They are rich sources of fibre and have lot of antioxidants.

5. It’s don’t require much pesticides so it doesn’t get dirty.


Top Nutritional and Health Benefits of Bananas


Health benefits of Bananas


There are many health benefits of bananas like -


Bananas can help regulate blood sugar


It might actually help lower blood sugar. For a lower Glycemic Index, eat green bananas. It is packed with fibre, it provides lots of energy. It helps in boosting your immune system.

Bananas may support heart health


It helps in curing heart diseases and regulates blood pressure and helps in recovering from illness, fighting fatigue, reducing the person's risk of cancer, diabetes, inflammation and other health problems,

Bananas may help with weight loss


The carbs helps you produces more serotonin, which helps regulate your metabolism. It helps in reducing constipation. Bananas contain no fat, sodium or cholesterol.

Bananas are good for digestive health


Bananas is an amazing food that help with digestion. It treats nausea, morning sickness, stomach problems and other infections. It keeps eyes and bone healthy. It also reduces the risk of kidney diseases. It helps in curing acne and pains.


You can also pin the below picture if you like it.


Top Nutritional and Health Benefits of Bananas


Bananas can be eaten both ways, riped and raw. Raw bananas are used to make different kinds of dishes. It can be eaten as banana chips or banana fritters. There are different recipes which can be made with riped bananas as well like smoothies, porridge, pancakes, ice creams, muffins, granola, blueberry bars. All of these recipes doesn’t take more than 15 minutes.


Love this? Try these..??


Tomato SoupStuffed Japanese Aubergine


Sunday, May 23, 2021

RAINBOW BUDDHA BOWL


Rainbow Buddha bowl is a healthy, filling and a delicious wholesome meal. It's a colorful bowl composed of vegetables proteins, healthy grains and nutrients.


Rainbow Buddha Bowl : This satisfying bowl of goodness is filled with rice, red kidney beans, broccoli, bell peppers and cucumber.

Rainbow in my bowl!!

Rainbow Buddha bowl is a satisfying bowl of goodness, filled with cooked rice, boiled red kidney beans, blanched broccoli, roasted bell peppers and sliced cucumber. I combined this with almond butter lime dressing to give it a touch of sweetness and it just turned out perfect! Buddha bowl is a simple way where you can also use your leftover food which is sitting in refrigerator. 

I had the most indulgent weekend ever. I had lots of chocolates and yummy treats, so I decided to make Buddha bowl for lunch. I picked up these gorgeous broccoli and colorful bell peppers at the farmer’s market this past weekend. Luckily, I had enough cooked rice and beans in my refrigerator to make this power-packed meal.


Rainbow Buddha bowl


While each portion of this plate has its own individuality and uniqueness. Red kidney beans are full of protein, fiber, vitamin and nutrients. Though rice doesn’t offer much in terms of nutrients but is a good source of carbs. You can always switch white rice with brown rice since it has more nutrients and is relatively low in calories. I totally love the combination of broccoli and bell peppers as they add crunch, color and sweet flavor to the meal. Broccoli is one of my favorite cruciferous vegetable. It is rich in dietary fiber, minerals, nutrients and antioxidants and bell peppers are rich in antioxidants and other vitamins.

Buddha bowl is a versatile meal. To make this, obviously you'd have to make rice and beans ahead of time. I always try to make it differently, depending on what is available at my home. Follow these few simple steps to make a this beautiful Rainbow Buddha Bowl that I have listed below. 


RAINBOW BUDDHA BOWL


Serves: 2 People
Preparation time: 10 minutes
Cooking time: 40 minutes 
Author: The Food Root


INGREDIENTS


Red Kidney Beans:
3/4 cup red kidney beans
2 cups water
3/4 tablespoon salt or as per taste

Rice:
1 cup rice
2 cups water
3/4 tablespoon salt or as per taste

Broccoli:
1 head broccoli
2 cups water
1/2 tablespoon salt or as per taste

Roast Veggies:
1 tablespoon olive oil
1/2 red bell pepper, thinly sliced
1/2 yellow bell pepper, thinly sliced
1/4 teaspoon chili flakes
3-4 garlic cloves, chopped
1/4 tablespoon salt or as per taste

Chop Raw Veggies
1 cucumber, finely sliced

Dressing
1/4 cup Almond butter
1 tablespoon lemon juice
1 tablespoon soy sauce
1 tablespoon garlic, minced
1 tablespoon ginger, minced
2 tablespoons water
Salt and pepper as per taste


DIRECTIONS


1. Prepare Red Kidney Beans: Wash 3/4 cup red kidney beans, under the running water. Drain and soak them overnight or in the morning for at least 4-5 hours. After soaking the beans, rinse them with fresh water. Now place a pressure cooker, add beans with enough water and pressure cook them for at least 40 minutes on medium-low flame. After 40 minutes, turn off the heat and wait for the pressure to release completely. Add salt and stir it for few more minutes till it's properly cooked. Drain the water off the cooked beans and let it cool for some time.


2. Boil Rice: Rinse 1 cup basmati rice with cold water, soak it for about 30 minutes. Place a saucepan with double amount of water to boil. Add salt and loosely cover the pan. Reduce the heat and cook the rice for about 10 minutes. Stir it once and turn off the flame. Let the rice sit for about 5-7 minutes. Drain the rice using a colander or a strainer. Let it cool for some time.


3. Blanch Broccoli: Wash the broccoli and cut them into large individual florets. You can also cut the stem into thin circular pieces. Bring in a large pot of water to boil. When water starts to boil, add broccoli florets and a pinch of salt into it. Meanwhile, fill a bowl with cold water preferably with ice cubes in it. Set it aside. After 3-4 minutes remove the florets with slotted spoon in a colander or a sieve. Now immediately, plunge the florets into the bowl of cold water. After a minute, strain them. Keep it aside.


4. Roast Veggies: Wash the pepper, slice it into half, remove the excess seeds and slice off the thin strips length wise. Heat olive oil in a skillet, add chili flakes followed by sliced bell pepper and sauté until it turns golden brown, about 5 minutes. Sauté it and season them with salt and garlic cloves. Toss it for about a minute on medium flame and turn off the flame. Set it aside.


5. Chop Raw Veggies: Chop any raw veggies you like. It depends on your taste. I added fresh cucumber in my bowl.


6. Prepare the Dressing: To make a dressing, whisk 1/4 cup almond butter, 1 tablespoon lemon juice, 1 tablespoon soy sauce, 1 tablespoon minced garlic, 1 tablespoon minced ginger and 2 tablespoons water in a bowl, add salt and pepper to taste.


7. Assemble: Assemble your bowl, add red kidney beans, rice, broccoli, roasted bell peppers and sliced cucumber. Season the bowl with salt and pepper. Drizzle the yummy almond butter lime dressing and gently toss them to combine. Enjoy!!


ENJOY YOUR RAINBOW BUDDHA BOWL, AND LET US KNOW HOW YOU LIKE IN THE COMMENTS BELOW!


Monday, May 3, 2021

Soya Chaap Masala


Soya Chaap Masala is a dish where Soya Chaap pieces are fried and marinated, and than added into a spiced onion-tomato based fragrant gravy. Pair it with a naan or steamed rice and enjoy!


Soya Chaap Masala


Soya Chaap Gravy that we made for lunch today, turned out so yum that i wanted to share the recipe with you all, right away!


What is Soya Chaap?


Soya Chaap is a prepared with soybean flour and whole wheat flour. Mostly the ratio of soybean is 60% and whole wheat flour is 40%. This thick flour is wrapped into a stick and comes in a can. Use within 2-3 days after opening the can.


Soya chaap is a great substitute of veg and can be use in alternatives of non-veg, meat eaters and many more. It gives a meaty and chewy texture. It's a good source of protein for vegetarians or vegans.


You can serve it with tandoori roti, naan, kulcha, or steamed rice. These Soya chunks comes in a can which you buy from a nearby supermarket or can also buy online.


What are the variations of Soya Chaap?


Soya Chaap can be used in various recipes like Punjabi Soya Chaap, Tandoori Soya Chaap, Malai Soya Chaap, Tandoori Malai Soya Chaap, Afghani Soya Chaap, Soya Chaap Roll, Soya Chaap Kabab, Soya Chaap Recipe Gravy or Soya Chaap Masala and many others. 


A dry version goes well as a starter. The semi-dry recipes goes well with steamed rice. The gravy version goes well with chapatis, naan, parantha or kulchas. The one I'm making is Soya Chaap Gravy also known as Soya Chaap Masala. 


So, use a packet or tin of Soya Chaap differently cuz you can make variety of dishes from it. 


How to Make Soya Chaap Masala?


Soya Chaap Masala is a popular street dish in Delhi and many other North Indian Cities. Soya Chaap Gravy is vegetarian dish which can be easily made at home. It is full of protein and taste delicious.


Fried Soya Chaap chunks are marinated into yogurt, butter and chaat masala for half an hour, and than added into a spiced onion-tomato based gravy. Pair it with a naan or steamed rice and enjoy! 


Soya Chaap Gravy takes less than half an hour to make. It's suitable for weekday meals or weekend special parties or events. Soya chaap is made from soybean flour and whole wheat flour, which gives it a meaty and chewy texture. It is delicious treat not for just vegetarians but for meat-lovers too.


Step by Step Pictures of making Soya Chaap Masala


How to Marinade the Soya Chaap?


1. The process is pretty simple first, wash and dry all the Soya Chaaps along with sticks. Remove the Soya Chaap from the sticks and cut them into 1-1.5 inch chunks.


Soya Chaap Masala


2. Heat oil in a deep bottomed pan and shallow-fry the Soya Chaap Chunks on a lower-medium flame or till it turns golden brown. This will take about 6-8 minutes.


Soya Chaap Masala


3.  Marinate the fried Soya Chaap Chunks with butter, chaat masala and yogurt. 


4. Mix until all the fried Soya Chaap Chunks are well coated. Cover the bowl and refrigerate for minimum for 30-40 minutes.


Soya Chaap Masala


How to make Soya Chaap Gravy?


1. Grind tomatoes, ginger, garlic and green chilli to form a smooth paste.


Soya Chaap Masala


2. Heat 2-3 tbsp oil. Add sliced onions & cook on a lower medium flame till it turns golden brown. This would take about 5-7 minutes.


Soya Chaap Gravy | Soya Chaap Masala


Soya Chaap Masala


3. Grind onions and a cup of water in a blender to form a smooth paste.


Soya Chaap Masala


4. Add a pinch of asafoetida and cumin seeds in the remaining oil. When seeds starts to sputter, add tomatoes & cook it on a lower medium flame for about 5-7 minutes until all the moisture is gone and the mixture is nicely roasted.


Soya Chaap Masala


5. Next, add spices like salt, turmeric powder, red chilli powder, cumin powder, coriander powder, garam masala, and give it a good mix to make sure that the spices are well combined.


Soya Chaap Masala


6. Add onions into the the tomato paste and stir continuously for about a minute.


Soya Chaap Masala


7. Add roasted Soya Chaap pieces into the onion-tomato paste and mix it than cover over low heat for 5-7 minutes.


Soya Chaap Masala


8. Now add 2 cups of water and cover over low heat for 10 minutes.


Soya Chaap Masala


9. Add chopped coriander leaves and stir for about 2 minutes. Mix properly and turn off the flame.


10. Serve soya chaap gravy with steamed rice, naan or kulcha.


Soya Chaap Masala


How to make Soya Chaap Masala?


Preparation time: 15 minutes
Cooking time: 30 minutes
Serves: 4-6 People
Author : The Food Root


Ingredients:


for marination


6 Soya Chaap Sticks
Oil for shallow frying Soya Chaap pieces
3 tbsp yogurt
2 tbsp butter
2 tbsp chaat masala or 1 tbsp salt

for onion tomato gravy


5 tomatoes, roughly chopped
3 onions, sliced
2-3 tbsp oil
3/4 inch ginger, grated
4-5 garlic cloves
2-3 green chillies
2 cups of water
a pinch of asafoetida
1 tbsp cumin seeds
3/4 tbsp coriander powder
3/4 tbsp red chilli powder
3/4 tbsp turmeric powder
3/4 tbsp cumin powder
1/4 tsp garam masala
1 tbsp salt or as per your taste
1 handful fresh coriander freah leaves, chopped 


Method:


How to Marinate Soya chaap


1. Wash and dry all the Soya Chaaps along with sticks. Remove the Soya Chaap from the sticks and cut them into 1-1.5 inch chunks.

2. Heat the oil and shallow fry the pieces from both the sides on a lower medium flame or till it turns golden brown. This will take about 6-8 minutes.

3. Marinate the fried Soya Chaap with butter, chaat masala and yogurt. 

4. Mix until all the fried Soya Chaaps are well coated. Cover the bowl and refrigerte for minimum for 30 minutes.


How to Make Onion-Tomato Gravy


1. Grind tomatoes, ginger, garlic and green chillies to form a smooth paste.

2. Heat oil. Add sliced onions & cook them on a lower medium flame till it turns golden brown. This would take about 5-7 minutes.

3. Grind onions and a cup of water in a blender to form a smooth paste.

4. Add a pinch of asafoetida and cumin seeds in the remaining oil. 

5. When seeds starts to sputter, add tomato pulp & stir continuously on a lower medium flame for about 5-6 minutes until the mixture is nicely roasted.

6. Next, add spices like salt, turmeric powder, red chilli powder, cumin powder, coriander powder, garam masala, and give it a good mix to make sure that the spices are well combined.

7. Add onions into the the tomato paste and stir continuously for about a minute.

8. Add roasted Soya Chaap pieces into the tomato-onion paste and mix it than cover over low heat for 5-7 minutes.

9. Now add 2 cups of water and cover over low heat for 10 minutes.

10. Add chopped coriander leaves and stir for about 2 minutes. Mix properly and turn off the flame.

11. Serve soya chaap gravy with steamed rice, naan or kulcha.